

Getting Started
Please see the chart below to help determine the best Lucid user option for you.

Licensed Users: Customers who can create and manage Lucidspark boards and Lucidchart diagrams.
Licenses are intended for Board Owners, Scrum Masters, RTEs, Product Owners, and Team Managers. If this is not your role, please select an option below. If determined in the future a license is required, a HARP request should be submitted to move your user type.
Requesting Your QualityNet Lucid Role in HARP
Requires a HARP account (For instructions on the process, refer to the HARP page). Expand the steps below to view the role request process.
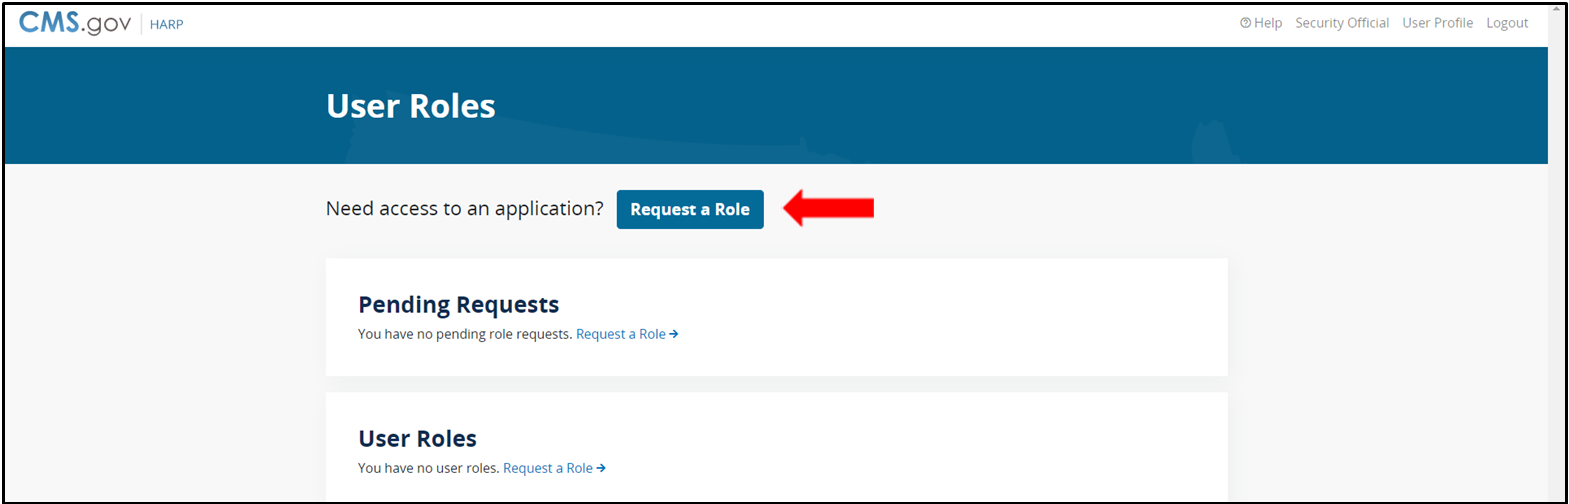
Go to https://harp.qualitynet.org and log into your HARP account.


Limited Access User (View Only Access): Customers become a registered user with Lucid. Each user can view Lucidspark boards shared with them.
Lucidspark users can access a max of five (5) boards per year as a Limited Access User (via a shareable link with guest collaborator permissions from the host/owner).
Requesting Your QualityNet Lucid Role in HARP
Requires a HARP account (For instructions on the process, refer to the HARP page). Expand the steps below to view the role request process.
Go to https://harp.qualitynet.org and log into your HARP account.


Anonymous Guest: Users that are not registered with Lucid can join the board to collaborate and contribute to the work with a guest provided link from the host.
This option does not require a Lucid role. Please reach out to the board owner to gain access as an Anonymous Guest.
Integrations
Lucidspark with Jira
Customers can accomplish moving from brainstorming and ideation to big room planning, roadmapping, sprint planning, basic dependency mapping, and backlog refinement. The Lucid Cards for Jira integration allows customers to easily import Jira issues into Lucidspark and refresh your Cards to reflect any changes made in Jira.
Cards are bidirectionally synced with Jira in real-time. Edits made in Lucidspark are pushed back to Jira and edits in Jira are pulled into Lucidspark.
You will need to authenticate into Jira the first time you use it in a board, which you can do by following these steps:
- Open a Lucidspark board.
- Click
 the Jira icon on the left.
 - You will be asked to authenticate into Atlassian (Jira). Please sign in and authorize Lucid to access your Atlassian account.
1.Open your Lucidspark board.
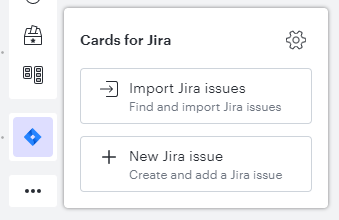
2. Click the Jira icon ![]() on the left and select Import Jira issues.
on the left and select Import Jira issues.
3. Choose which issues to import.
4. Once the issue is imported into your Lucidspark board, you can edit the Issue Summary on the card itself and edit other fields In the context menu. Editing the other fields requires ensuring the card is selecting and clicking on the pencil icon.
1.Open your Lucidspark board.
2. Click the Jira icon ![]() on the left and select New Jira issue.
on the left and select New Jira issue.
3. Enter required fields for the project or issue type.
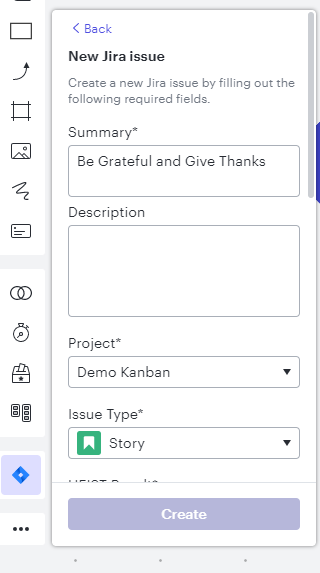
4. Click Create.
Follow the steps below to successfully import your Jira issues into the Dynamic Matrix, pivot the matrix, and update data.
Import Jira issues into the Dynamic Matrix
- Open a Lucidspark board.
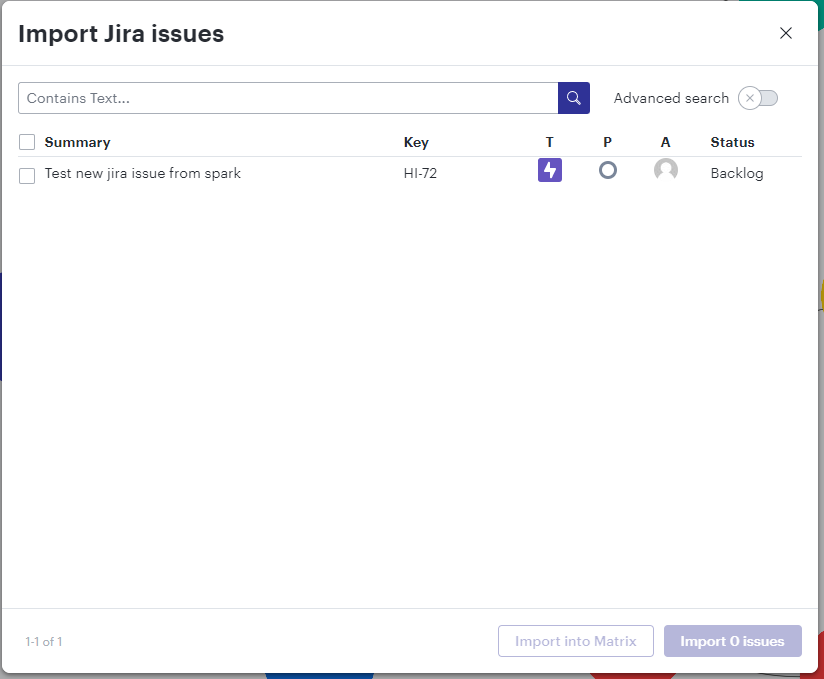
- Click the Jira icon and select Import Jira issues.
- Select the issues you want to import.
- Select Import into Matrix.
Pivoting the Dynamic Matrix
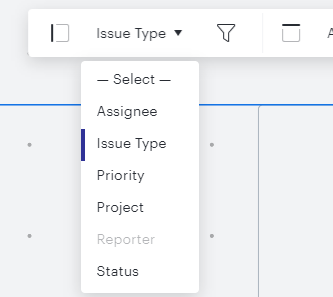
Click the Dynamic Matrix and use the field drop down menus to pivot the configuration of the matrix.
You can also click and drag rows and columns to rearrange them.
Filter Rows and Columns
Using the filter icon, you can filter which values appear in the matrix for each pivot.

Edit Cards in a Dynamic Matrix
You can double click on Cards to edit their data as you would outside the Dynamic Matrix.
You can also edit Jira fields by dragging cards across rows and columns.
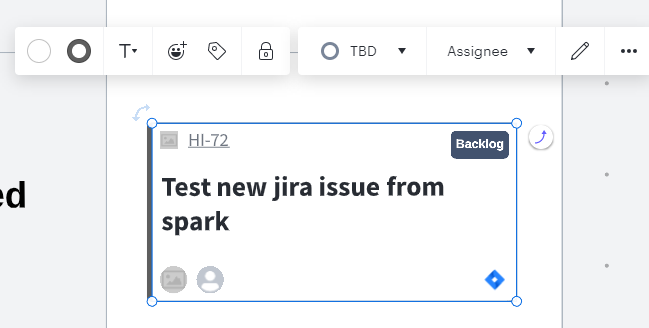
- Right click on either an individual sticky note or a group of sticky notes and select Convert to Jira issue.


- Fill out the required fields.


- You can edit more information after you convert your sticky note(s).
FAQs
To create a new Breakout Board:
- Select
 the Breakout Board icon from the Primary Toolbar.
 - Click the tile to “Add new breakout”.
A Breakout Board will be automatically labeled. To rename a board, join the board you’d like to update and type the new title in the upper left-hand corner.
To start the breakout session, select Start Breakout. The Breakout Boards panel will become visible to all participants and they'll be able to select a board to join, which will send them to a separate Lucidspark board.

You can also share a direct link to a Breakout Board. You can do this by selecting Copy direct link from the three-dot menu in the Breakout Board panel and from within a Breakout Board by selecting ![]() in the upper-right corner.
in the upper-right corner.
Note: Shareable Links will need to be enabled from the Main Board's Share settings to allow creation of and access to direct links.

When the session is over, select Call Back to bring everyone back to the Main Board. Participants can also navigate back to the main board themselves at any time by clicking ![]() in the upper-left side corner.
in the upper-left side corner.

Lucidspark keeps a log of all changes made to a board using the Revision History tool! It's accessible within the menu near the title of your board.

The board’s edit history will display as a list of stacked tiles, with each tile representing a past version of the board. Each tile will display the date and time the changes were made, as well as the full name or email address of the user who made the changes.
Add a Note to a Shape
To add a note to a shape, right click on the shape and select “Add Note” from the dropdown.
Note Icon on Shape
After adding a note to a shape, you will see ![]() the note icon on the top right corner of the shape. If you click on the note icon, it will show the note you added.
the note icon on the top right corner of the shape. If you click on the note icon, it will show the note you added.
Delete a Note from a Shape
To delete a note from a shape, right click on the shape and select “Delete Note” from the dropdown.
- Selectthe Breakout Board icon from the Primary Toolbar.
- Hover your cursor over the board you’d like to join.
- Click Join.

- Select
 in the upper left-hand corner of your canvas when you’re ready.
You can also join a Breakout Board by clicking a direct link the facilitator or another participant has shared with you.
You have multiple options when managing Breakout Boards. To access this menu, hover over a board’s tile and select the three-dot menu.

With this menu you can:
- Join a board to participate
- Rename a board to customize its title
- Copy direct link to share with participants
- Duplicate a board
- Insert all content of a Breakout Board to the Main Board
- Delete a board
A few tips
- Anyone on your Enterprise account with edit permissions to a board can create Breakout Boards.
- View-only users can join and view Breakout Boards.
- Guest Collaborators and free users can participate in existing Breakout Boards.
- Participants will only see collaborators for the Breakout Board they are in.
- You can move over specific shapes from the Breakout Board to the main board.
- To add a single shape, copy the shape and paste it in the Main Board.
- To select multiple shapes, hold the Shift key while selecting shapes to copy, then paste in the Main Board.
- You can also add all content of a Breakout Board to the Main Board by dragging and dropping the thumbnail of a board from the Breakout Board panel onto the canvas.
To add a web link to an object:
- Select a shape.
- Click the link icon from the Context Toolbar.
- Paste the URL and click Apply.
- To change the shape to display a preview of the linked content, select Convert to Link Preview.

Link Preview
If you convert to Link Preview, a separate shape containing a thumbnail will be populated. You may see the following options in the Context Toolbar for the thumbnail:
 Refresh the thumbnail image(s)
 Navigate thumbnails will appear as arrows that will allow you to switch between the images, if there are more than one
 Extract thumbnails to extract the thumbnail image(s)
 Expand view if there is an iframe to display
Add a Web Link to text
To add a web link to specific text (whether in a text box or on an object), highlight the portion of the text that you would like linked and then follow the steps explained above — select the link icon from the Context Toolbar, paste in the URL, and hit “Apply.”
A blue line will appear under the selected text to indicate that a web link has been applied.

Trigger the Link
To trigger the link and open the linked webpage on a PC, press Shift + Ctrl and then click on the object or text that you applied a web link to. If you are using a Mac, press Shift + Command and then click on the object or text.
These instructions will also appear on your board if you hover over/click on an object that has a web link attached to it.

- Choose the Line option from the Primary Toolbar or press “L” on your keyboard, then click and drag your cursor across the canvas.

- To attach a line to a shape, you can:
Select the shape, click on the arrow in the upper right corner, position the line by moving your cursor across the canvas, and single click to attach it to the canvas or to another shape.
Move an independent line close to a shape, where it will automatically attach to the shape’s border.
- To attach a line to a shape, you can:
All formatting tools for lines are available in the Formatting Toolbar when a line is selected.
- Shape: Lucidspark offers three options for line shape - straight, curved, or elbow, which are available in the Shape dropdown menu. By default, new lines will have the curved shape.

Additionally, you can add more joints to elbow lines by clicking and dragging the solid blue dots along the line path. For curved lines, you can alter the depth and shape of the curve using the handlebars located at joints and arrowheads.


- Color: Simply choose a color from the color palette to apply it to your line. To choose a custom color, select
 the plus icon and use the slider and cursor to customize a color.
- Width: The thickness of a line can be adjusted by choosing the pixel size from the Width dropdown menu.

- Style: Make a line path solid or dashed by choosing a style option from the Style dropdown menu.

- Arrows: Choose from a variety of arrowheads for one or both ends of your line using the Arrow dropdown menu.

To import a data set from Google Sheet, Excel, or CSV into a Lucidchart document, follow these steps:
- Open a Lucidchart document.
- Click
 the data linking icon in the left bar.
 - Click Link Data.
- In the window that appears, click Import Your Data.
- Select the file type (Google Sheets, Excel, or CSV) that you would like to import, or select to choose a file that you have already uploaded to Lucidchart.
- Click Choose File.
- If you are importing data from a Google Sheet, you will need to grant Lucidchart permission to access your Google account. Click Authenticate, select your Google account, and click Allow to grant this permission.
- Select an Excel or CSV file from your device and click Open.
- If you are importing data from a Google Sheet, select a sheet and click Select.
- Select which pages of your spreadsheet you want to import and click Next.
- After importing your data, Lucidchart will prompt you to identify the header row of your data set. Select your header row.
- Click Next.
- In the next window, Lucidchart will prompt you to select a column of your data that contains reference keys for the contents of each row. Reference keys allow Lucidchart to keep track of your data even after you make structural changes to it, such as removing, adding, or reordering rows. Select the column that contains unique identifiers, if you have one.
- Click Finish.
Select Where to Attach Image on Editor
Select the Shape, Line, Page, etc. that you wish to attach an image to. Your image with be attached to whatever you have selected, be it a page or a shape.
Locate the Attach Images feature
The Attached Images feature can be found in the menu on the right hand side of the editor.
Click on ![]() the menu icon to open up the options and upload Attached Images.
the menu icon to open up the options and upload Attached Images.
Upload images into the Attach Images section
You can attach images via the (+) icon, by clicking ‘Choose a file’, or by dragging & dropping a file into the Attach Images section.

Supported file types are: .bmp, .gif, .jpeg, .jpg, .png, .jpe, .tiff, .tif, .psd, .ai, .pdf, and .svg
Note: Since PDFs will be attached as an image, only the first page of the PDF will be attached.
Attach Image Icon on Shapes
If you attach an image to a shape, you will see ![]() the image icon on the right upper corner of the shape.
the image icon on the right upper corner of the shape.
To access Revision History, select ![]() the clock icon from the menu bar at the top of your document. Alternatively, select Revision History from the File menu.
the clock icon from the menu bar at the top of your document. Alternatively, select Revision History from the File menu.
The document’s edit history will display as a list of stacked tiles, with each tile representing a past version of the document. Each tile will display the date and time the changes were made, as well as the full name of the user who made the changes.

Note: The times will correspond with the time zone of the current document viewer.

Scroll to the bottom of the menu to see how long ago the document was created.

There are four tiers of sharing permissions that you can choose from when sharing folders, documents, boards, and models:
- Can edit and share
- Can edit
- Can comment
- Can view
You can set different permissions for each collaborator and adjust them any time.
To adjust permissions, follow these steps:
- Navigate to Share, as described in the sections above.
- Select Manage in the Collaborators section.
- Click the sharing permissions icon for the user you would like to adjust the sharing permissions for.
- Select the desired permission option from the dropdown.

Note: If a collaborator is on a lower-level account type than you, they may not be able to edit the shared document, boards, and models even if you have given them edit access.
- CCSQ Support Central: Provides you with multi-program support to submit a new ticket, and track the status of an existing case, incident, or request. No login required. https://cmsqualitysupport.servicenowservices.com/ccsq_support_central
- ServiceNow Service Portal: Intended only for CMS employees and contractors. The portal provides self-service options for internal customers to report Security Incidents, submit Service Requests for tools or services offered to the internal QualityNet community, report an Incident, provide Approvals, or access internal Knowledge Base articles. The portal enables internal customers to track the status of tickets and requires a login. https://cmsqualitysupport.servicenowservices.com/sp_ess
- Service Center: For any Lucidspark related questions or questions relating to content on the QualityNet website, Please contact the Service Center.
- Phone: (866) 288-8914 (TRS:711)
- Slack: #help-service-center-sos
- Email: ServiceCenterSOS@cms.hhs.gov
- Hours of Operation: 24/7